As an Amazon Associate I earn from qualifying purchases.
This article has been co-authored and fact-checked by Chef Sushmit Bhagat. He's the executive chef and owner of Pasta Gioia, a pasta-based subscription business. Chef Bhagat has cooked in kitchens all over the world, from Mumbai, to Dubai, to Toronto.
Contrary to popular belief, it's possible to make a simple homemade pasta with regular flour, not 00 or semolina. While there's nothing wrong with that flour, (you can easily substitute it in this recipe), it's not necessary. This step by step guide complete with video will walk you through the process from start to finish.
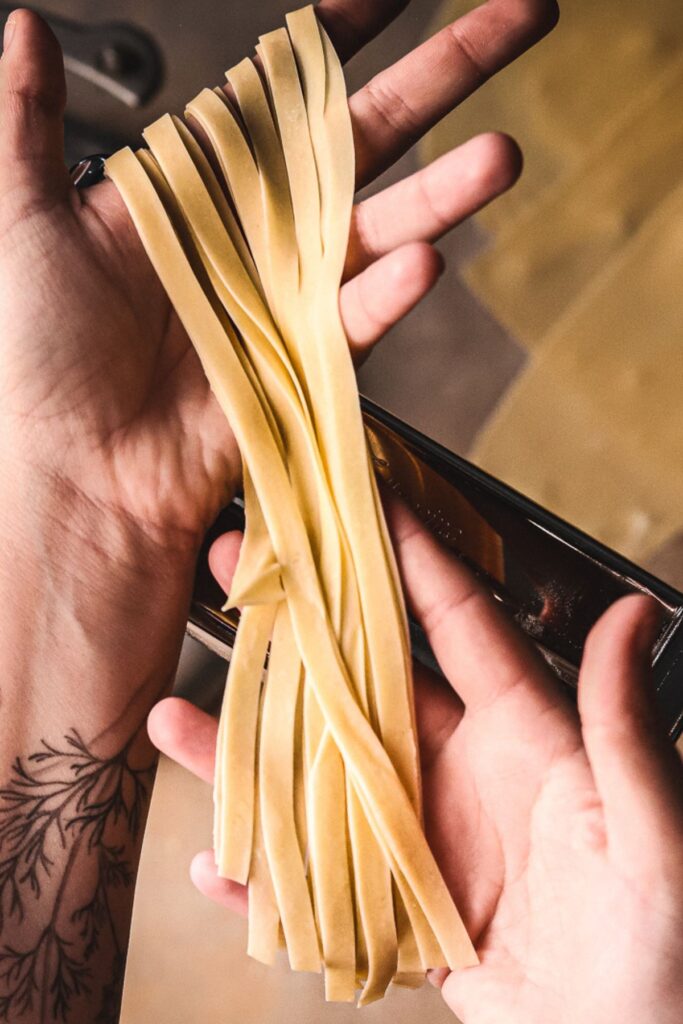
In fact, you likely have everything you need to make this pasta dough right now. It only needs three ingredients: all-purpose flour, eggs, and olive oil. That's it.
Learning how to make homemade pasta can be intimidating for first-timers. This step-by-step guide will show you how easy it really is!
Jump to:
- How to Use this Pasta Dough
- Semolina vs. Double Zero vs. All-Purpose Flour
- Equipment Needed
- Get Ready
- Ingredients
- How to Make Homemade Pasta - Step-By-Step
- Timeline
- How to Cut the Pasta By Hand
- Different Handmade Pasta Shapes
- How to Store Fresh Pasta
- How to Freeze Fresh Pasta
- How to Dry Pasta
- Tips and Tricks
- Trouble Shooting
- Frequently Asked Questions
- Awesome Pasta Recipes
- Homemade Sauces for Homemade Pasta
- 📖 Recipe
Making fresh pasta is one thing that will take your meals from good to gourmet every single time. It's almost always worth it. This recipe has been tested time and time again by Sushmit Bhagat, the head chef of Pasta Gioia. It's a pasta subscription service that delivers ready made pasta meals to your doorstep each month.
Chef Bhaghat prepares his pasta from scratch, by hand, day of for all of his customers, and this is the recipe he uses, and I'm lucky that he's decided to share it (plus all his tips and tricks) with me. We have both tested this recipe many, many times, and are pretty happy with the results. Keep in mind, depending on where you live, your climate, the size of your eggs, etc, you might need a little more flour dusting, or too add some moisture to the dough as you go (but we discuss that all below!).
So let's dive right in.
How to Use this Pasta Dough
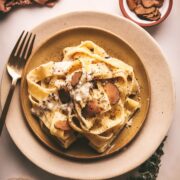
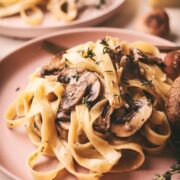
This is an incredibly versatile and easy dough that can be used in almost any situation. It's particularly great for flat noodles like pappardelle and fettucine. You can also use it for lasagna sheets or homemade ravioli. And it pairs perfectly with so many sauces and dishes: lobster ravioli sauce, truffle pasta, mushroom pasta, aglio e olio, and so so many more.
Semolina vs. Double Zero vs. All-Purpose Flour
Semolina flour is coarse, durum wheat-based flour. It's great if you like a more toothsome, sturdy, pasta, providing a hearty texture and nutty flavor. Double zero, or 00 flour is super-fine Italian flour. It's perfect for pasta and pizza dough, giving them a delicate, silky texture.
AP flour is, of course, all-purpose flour, versatile for tons of recipes. It strikes a balance between protein content, making it a kitchen staple. So, the texture might be a bit softer. If you want to experiment, you can definitely use semolina or 00 flour, or use a blend of several different types. You can most certainly experiment to find what works best for you. But, I stress, you don't have to. AP is awesome and works just fine!
Equipment Needed
For this recipe you'll either need a stand-mixer, like a Kitchen Aid with the pasta attachment (what I use in this recipe), or a hand pasta roller. I've used both many times, and either one works. You can make this with no machine for sure, but the stand-mixer with the pasta attachment is definitely more powerful and quicker.
A kitchen scale is also handy for this recipe, as it works best to weigh the flour. In a pinch, you'll see I've converted to Imperial the best I can for you!
Finally, a pastry scraper isn't necessary, but is super helpful at the end of the day and you have to scrape flour and egg off every surface in your home 😉
Get Ready
To prep your space (and yourself) for making this recipe, you'll need a few things.
First, a clean, flat work surface. Don't start without that.
Lots of space. And be prepared to make a mess - that's half the fun.
Old clothes (see the mess point above).
Get a clean, damp dish cloth ready to keep your pasta covered when you're not working with it. This keeps it from drying out.
Ingredients
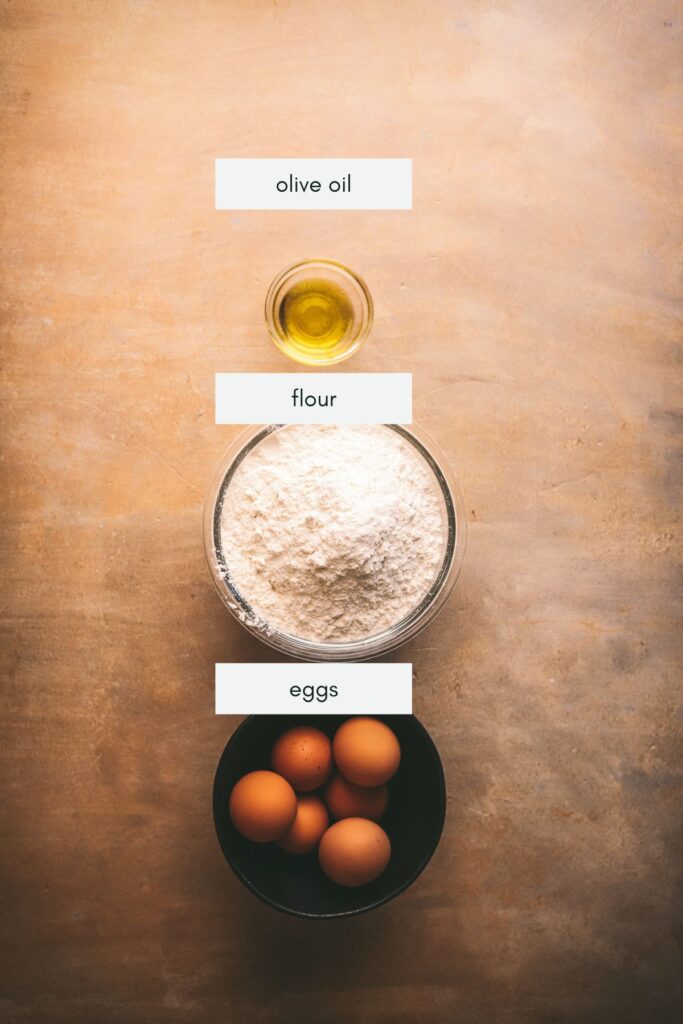
All-purpose flour: for the structure of the pasta. If you prefer, you can definitely use double zero or semolina flour.
Eggs: for flavor, moisture and helping to build gluten. We'll be using both full eggs, plus a couple of extra egg yolks in this recipe.
Olive oil: helps to smooth out the dough and give it the most beautiful texture.
How to Make Homemade Pasta - Step-By-Step
OK, so you've got your equipment. You've got your ingredients. You're ready. Let's do this.
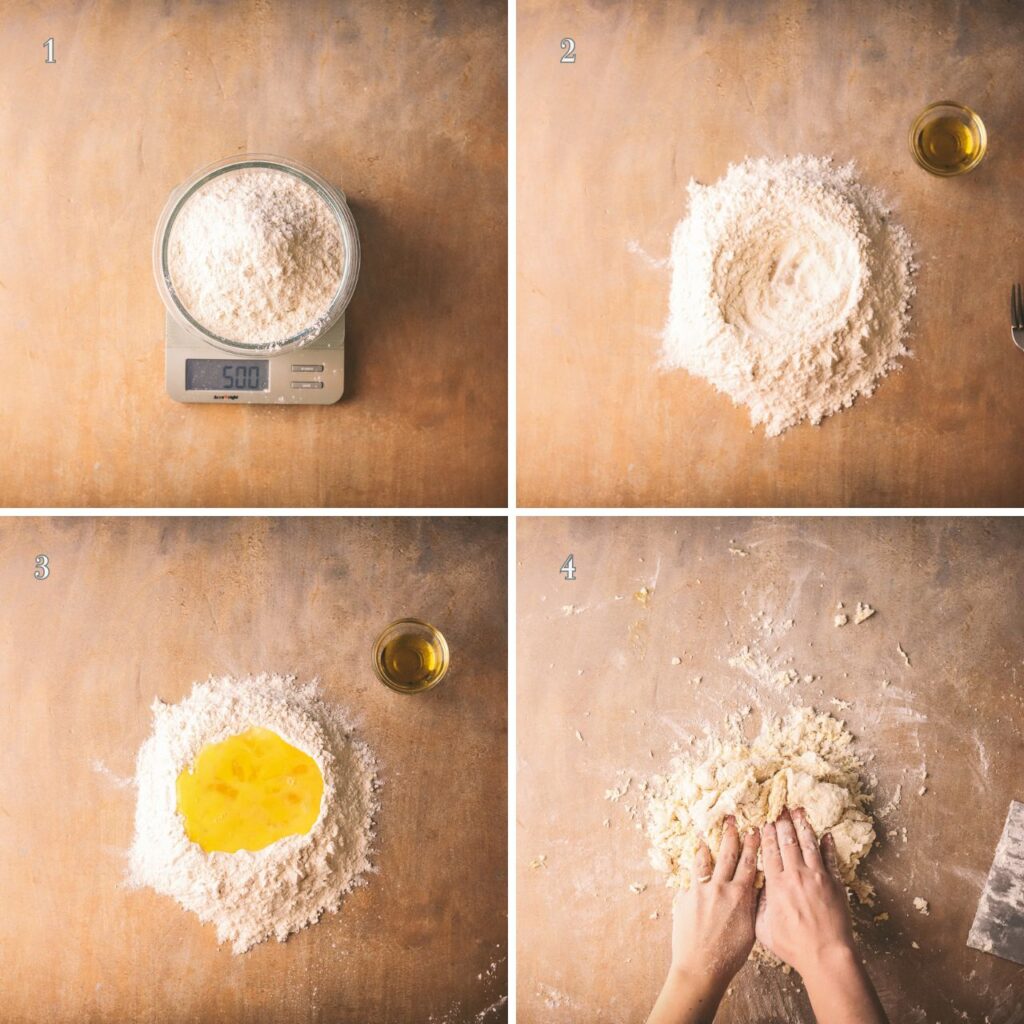
Step 1: Weigh out 500g of flour (or, use about four cups. We can't guarantee this will result in a perfect texture, but your pasta will still be delicious. Just a bit harder to work with).
Step 2: Gently beat eggs in a bowl. Add your olive oil and mix. Pour your flour into a mound on a clean, flat surface. Make a well.
Tip: I recommend making a larger, more shallow well. There's a lot of eggs going in here, and mine definitely sometimes overflows the well (if this happens, it's ok, just mix the egg and flour together as best you can).
Step 3: Add your eggs to the middle of the well.
Step 4: Gently start incorporating the flour into the egg mixture with a fork. Once the dough starts to come together, start working it with your hands.
Steps 5: The dough will start out very sticky and dry. This is the part that takes some love and patience. You're going to knead the dough for 10-15 minutes. There will times that it feels like it's not going to come together. It will! Just keep going!
Tip: If your dough is really fighting you, cover it and let it rest for two minutes, and then knead for two minutes. Cover and rest for 2, then knead for two. The resting helps the gluten develop, and leads to easier kneading.
Step 6: Keep kneading. Eventually, the dough will come together and feel smooth and slightly tacky, but not sticky.
Step 7: Wrap the dough in plastic wrap, or place under a damp, clean towel. Let it rest for at least 30 minutes. This is super important. The texture really starts to take shape during the resting period, and will make the rest of this process super easy.
Step 8: Set up your equipment of choice (stand mixer or hand roller).
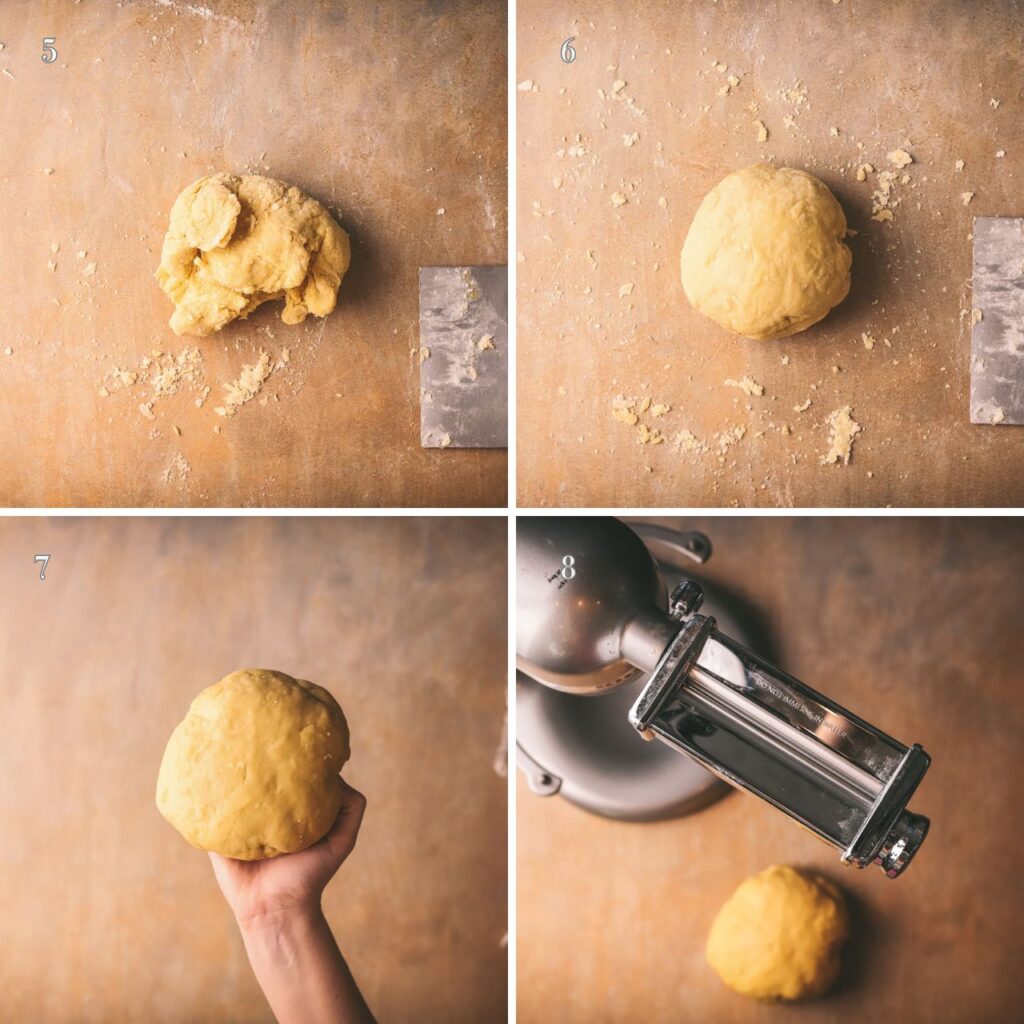
Step 9: Cut your dough ball into 4-6 pieces. Flatten one of the pieces into a flat disc. Set your stand mixer attachment or hand roller to level one thickness.
Step 10: Start feeding the dough through. Use extra flour to dust the dough and roller if needed (I didn't need extra flour this whole time - the dough wasn't sticky at all).
Step 11: Continue to let the dough feed through. You shouldn't need to pull it or help it at all once it gets going.
Step 12: Once the sheet is through, then fold into thirds, like an envelope. Feed it through on level one again.
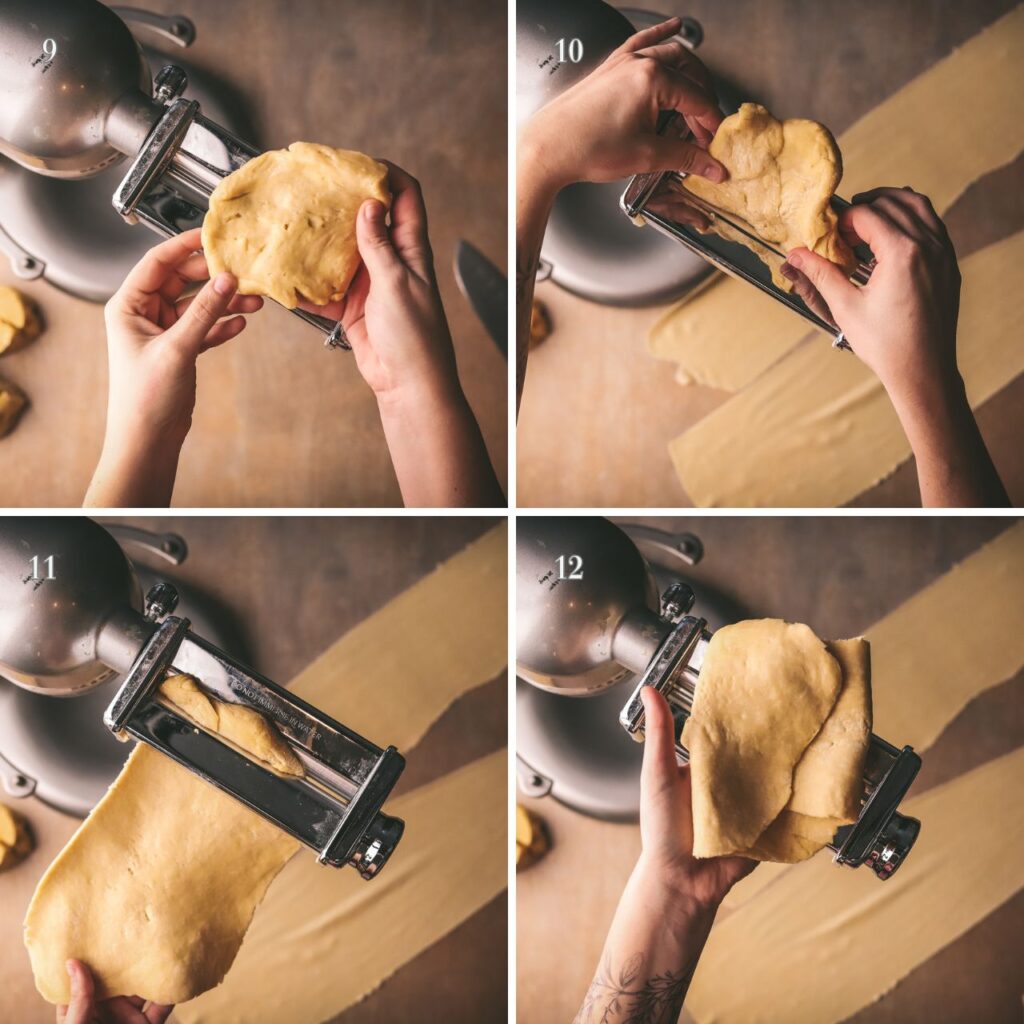
Step 13: Fold the sheet into thirds a second time, then feed it through the roller a third time.
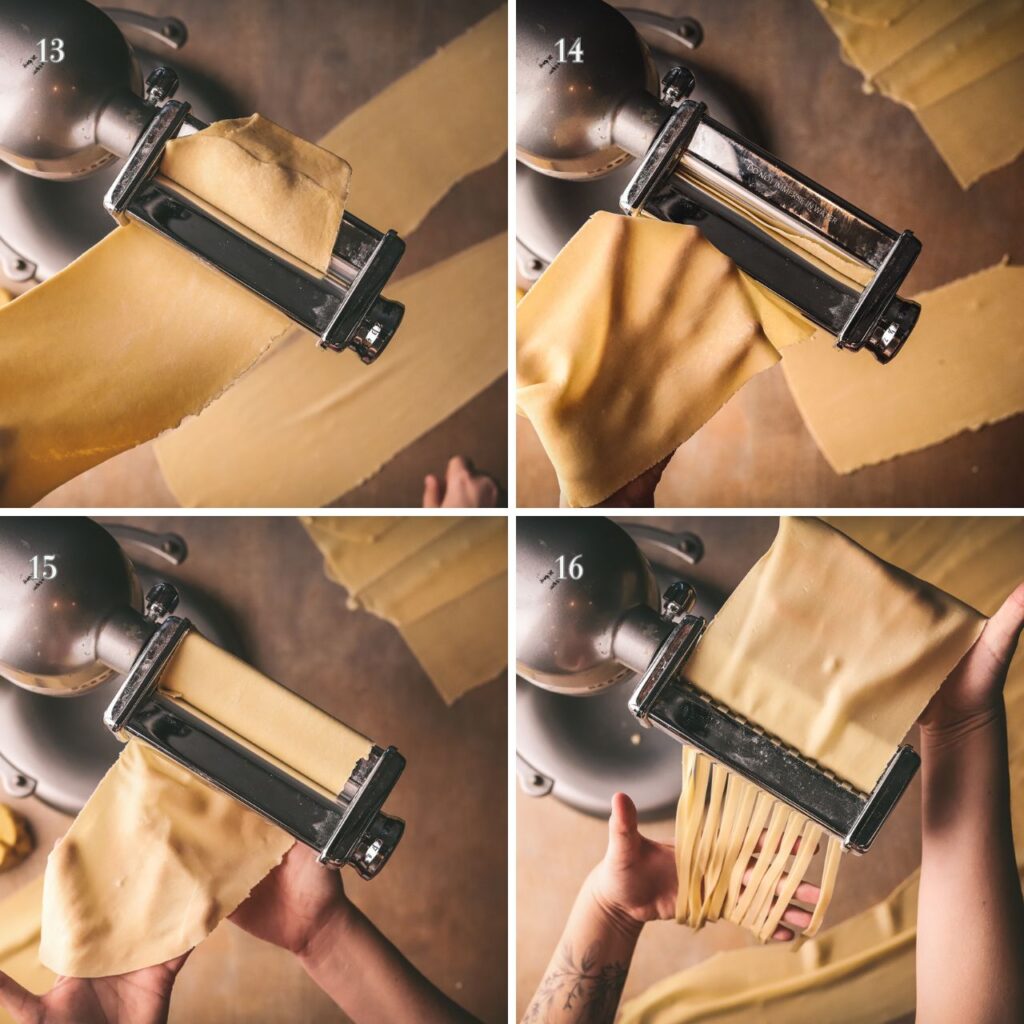
Step 14: Switch the roller to thickness level two. Dust with more flour if necessary. Feed the sheet through once, than switch the thickness to level three.
Tip: The sheets are obviously going to get longer as you go. Cut them in half as necessary.
Step 15: Feed the sheet through level three once, and then adjust thickness to level four, feed, and continue until you reach the desired level of thickness. I like it at a 4-5 for pasta, up to a seven for ravioli.
Tip: If you like more of a bite to your pasta, leave it thicker, like a level four. This is where I love to eat. My husband prefers a level six. Just depends on what you like!
Step 16: Cut the pasta if you're using the attachment. I'm using the fettucine attachment here.
Timeline
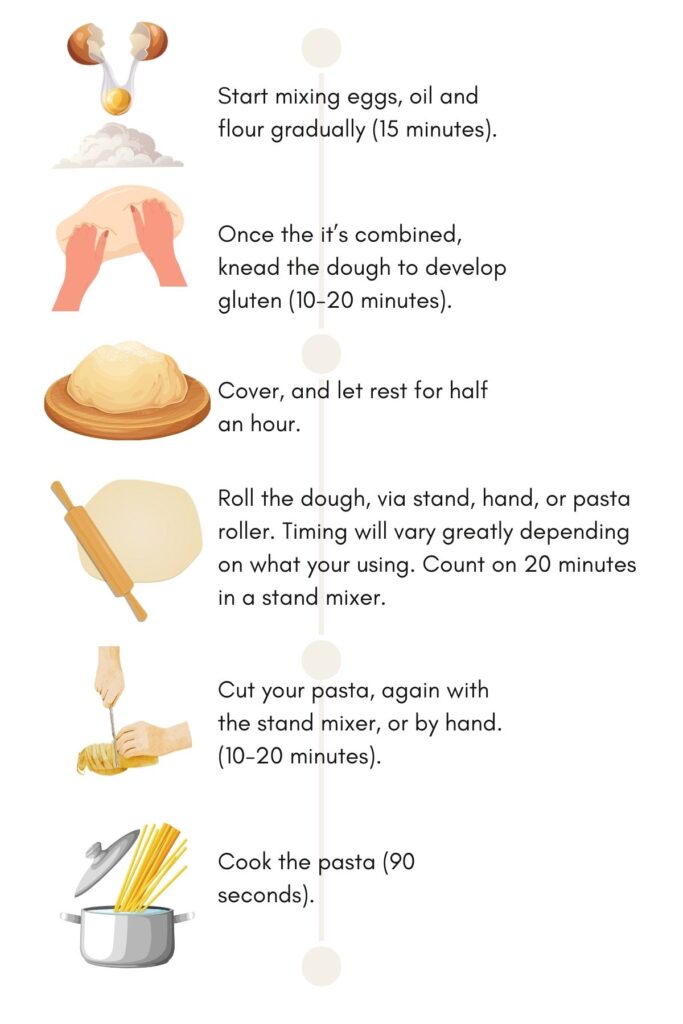
You can absolutely make homemade pasta ahead of time, and either store it fresh in your fridge, dry it, or freeze it (see below for more details on this). But I've created this timeline to let you know how long each step is going to take if you want to make it start to finish! It should take between 90 and 110 minutes (this depends on the equipment you use, and how long it takes to knead the dough).
Also - don't forget to think about clean-up time here! This process is a messy one. And it often involves multiple clean ups.
How to Cut the Pasta By Hand
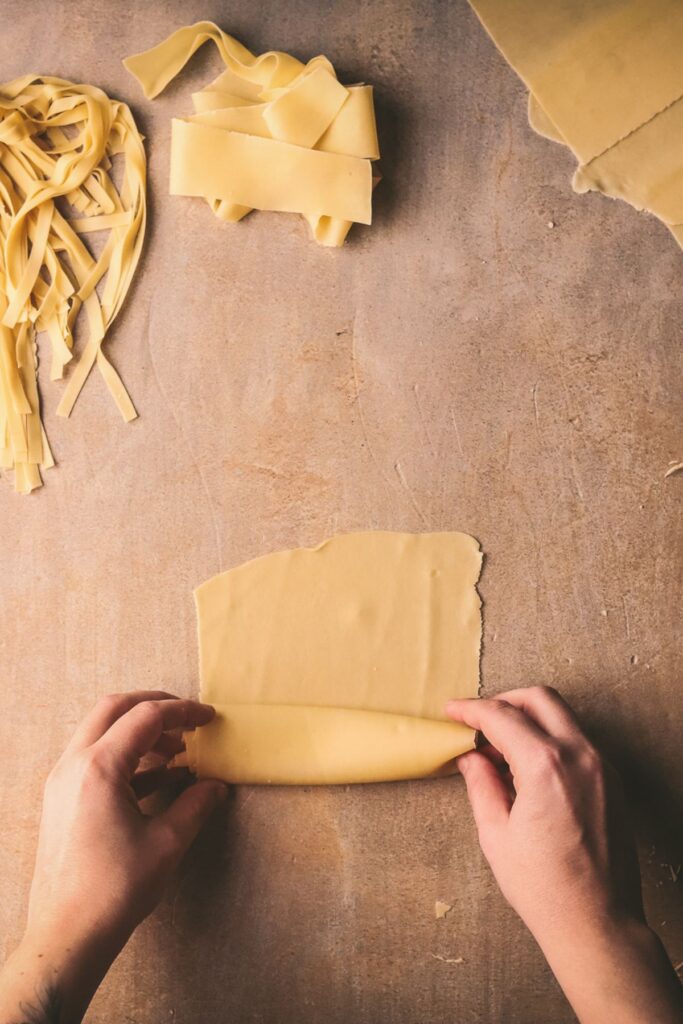
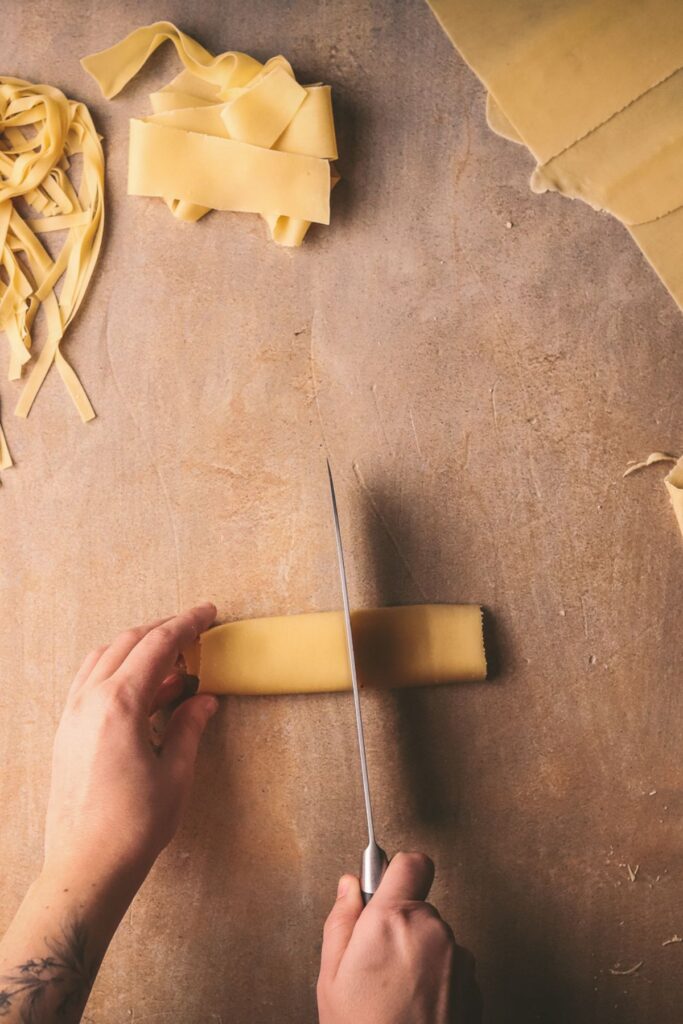
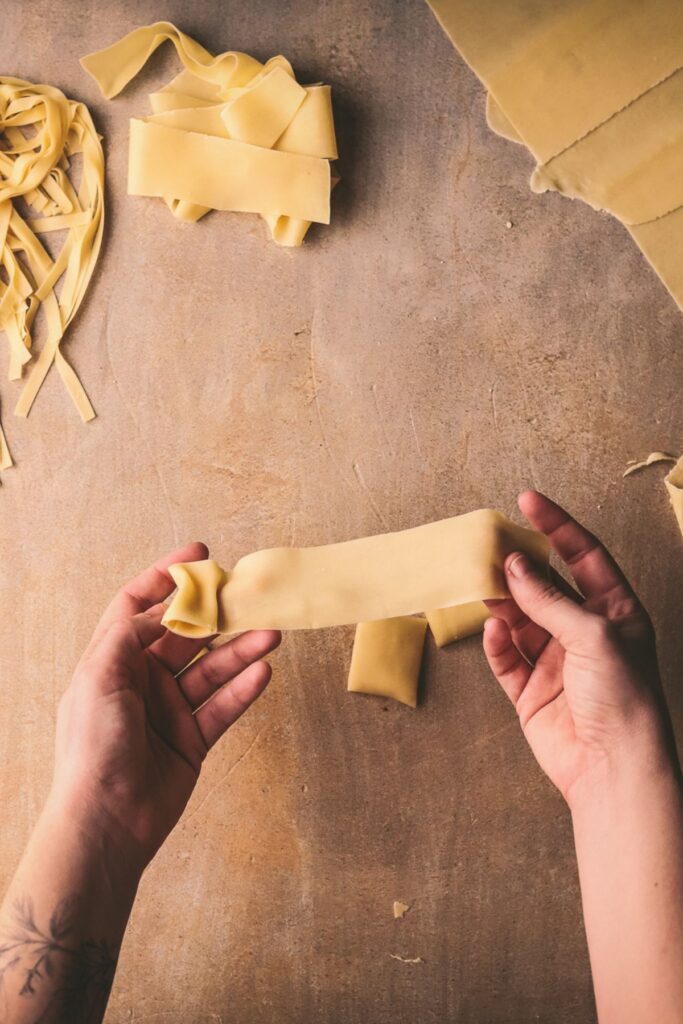
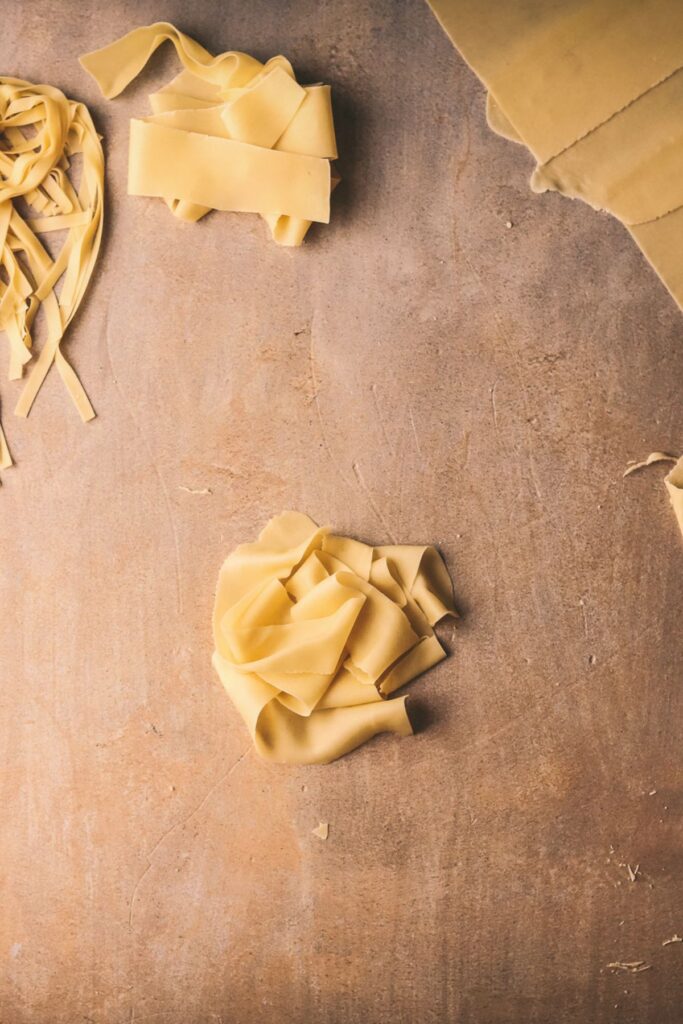
While the pasta roller is a necessity, the pasta cutter attachment isn't. You can totally cut whatever shape of flat pasta you want very easily with knife.
Here's how:
Different Handmade Pasta Shapes
If you're just starting out, generally speaking, it's easiest to go for the long, flat shapes - especially if you're cutting them by hand. Sheets of lasagna work great with this recipe as well!
- Tagliatelle and Fettuccine: Easy to roll and cut into long, flat ribbons.
- Ravioli: Making the sheets is easy. Filling...is another story.
- Pappardelle: Simple to roll and cut into wide strips, showcasing the handmade texture.
- Orecchiette and Cavatelli: Formed by hand, requiring minimal shaping and no special tools.
- Linguine: Straightforward to roll and cut into long, thin strands.
How to Store Fresh Pasta
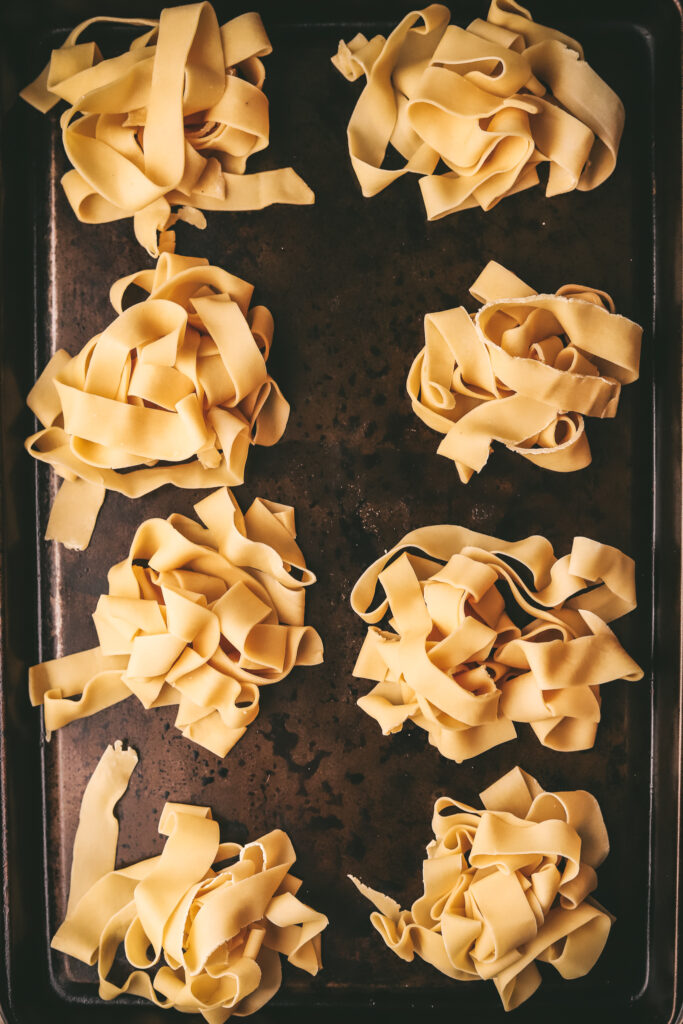
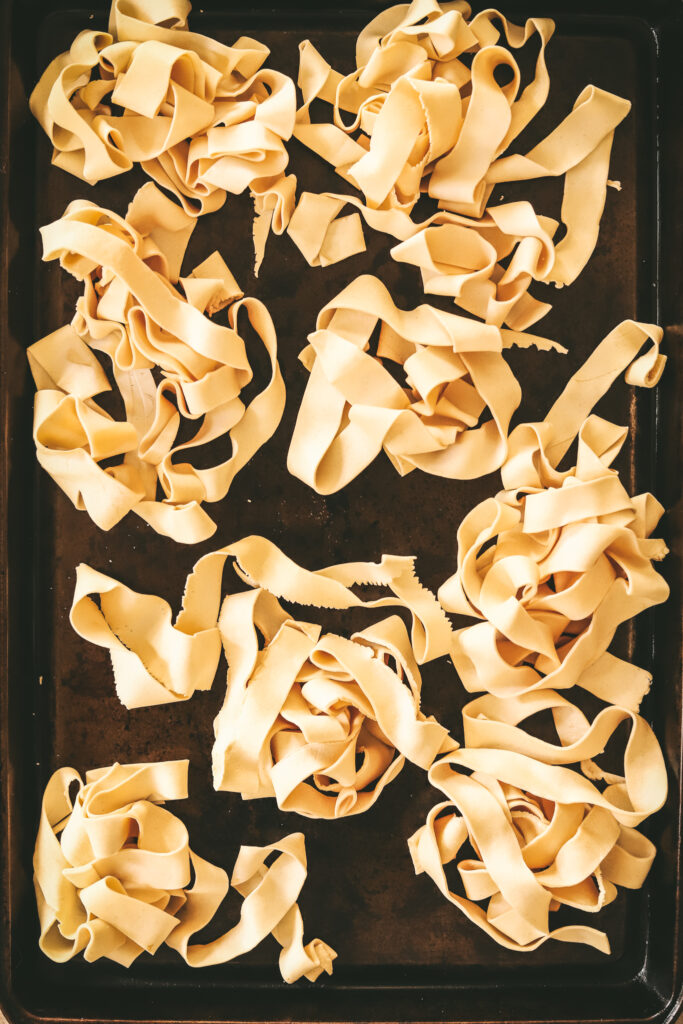
For fresh pasta, gently coat it with a bit of flour to prevent sticking, then loosely bundle or nestle in a tray. Cover with a damp cloth or plastic wrap. Store in the fridge for 1-2 days, ensuring it stays moist.
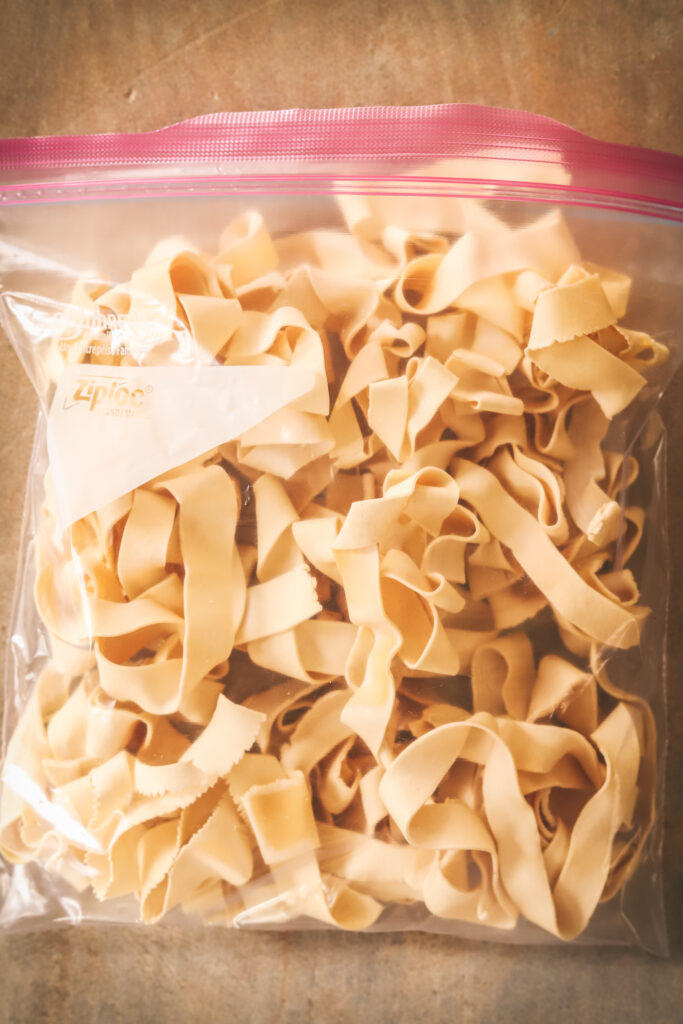
You can also store in a Ziploc bag, in a single layer (see below). If you need to have multiple layers, separate with parchment paper.
How to Freeze Fresh Pasta
Bundle your pasta coated in flour, lay them on a baking sheet to freeze individually, then transfer to an airtight bag. Super easy!
When you're ready to use, you can cook it straight from frozen.
How to Dry Pasta
Ok, so you can dry this pasta, but, it's not the best way to store it. It tends to crack along the edges. Freezing is a much better option, or, keep it in your fridge for a few days until you're ready to use it.
However, if you want to try, then let the pasta sit for 10 to 15 minutes, floured, in a single layer. If you have one of these pasta drying racks, it makes the whole process SO MUCH EASIER. This way you can spread out all the noodles, to make sure they don't stick together.
Once it's dry, store in an air-tight container on your counter. Separate the layers with parchment paper to prevent sticking. It still only lasts a few days this way, so again, I must stress: FREEZE IT.
Tips and Tricks
- If you live in a really dry climate, you might need to add an extra egg yolk (like me).
- On the other hand, if you live somewhere humid, you might need to keep the flour handy to dust your dough and noodles as you go.
- While you're not working with your dough or pasta sheets, cover in a damp cloth. This will prevent drying and cracking.
- Give yourself time, especially if it's your first time doing this! It takes a bit to get the feel for the dough.
Trouble Shooting
There are a few common problems that come up when working with pasta dough. Let's tackle a few of them.
Why is my pasta tough?
It could be from a lack of resting time, or it's not hydrated enough. You can add water a tablespoon at a time to the dough if you feel like this is the case.
Why is my pasta rubbery?
This usually happens if the pasta is overcooked (although, in my experience, it's much harder to overcook pasta that's been made from scratch.
My dough isn't coming together and looks like a flaky, dried mess. Yes I kneaded it. What can I do?
Usually it's because it don't have enough moisture or gluten developed. Try resting it for a few minutes, or adding water a tablespoon at a time and reworking the dough. The next time you make it, add an extra egg yolk at the beginning and see if that helps.
Frequently Asked Questions
Fresh, homemade pasta only takes about 90 seconds in boiling water to cook.
It depends. It will keep fresh in the fridge for a few days, but you can freeze it for three months!
Flour is your best friend here. If you feel it getting sticky, flour. After your done working with it: flour. Flour the dough, flour your tools, and you should be fine.
This happens because of oxidation. Exposure to air means your pasta will start to get discolored in the fridge after a day or so. It's not bad to eat, it just might look a little off.
YES! You definitely can. It will give you a different texture than the more traditional semolina or 00 varieties, but it's still delicious!
Homemade pasta, like any food, can be part of a balanced diet when enjoyed in moderation. While it's not inherently unhealthy, the nutritional value depends on the ingredients and serving size.
Awesome Pasta Recipes
Homemade Sauces for Homemade Pasta
The best recipes:
- Miso Mushroom Pasta Sauce
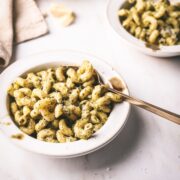
- Easy Classic Pesto
- Pesto Rosso
- Smoked Salmon With Crispy Caper
- Lobster Pasta with Champagne Cream Sauce
📖 Recipe
Homemade Pasta with Regular Flour
Equipment
- Pasta roller or
- Stand mixer with pasta attachment
Ingredients
- 500 g all-purpose flour
- 5 large eggs + 1-2 yolks
- 1 tablespoon olive oil
Instructions
- On a clean, flat work surface, make a well with your flour. I recommend a larger, more shallow well so the eggs don't overflow.
- Gently beat the eggs and olive oil together. Pour into the middle of your flour well.
- Gently start combining the flour from the edges into the middle with the eggs, mixing in the middle as you go. Add more and more flour each time. This process doesn't have to be exact, just do your best until it all comes together.
- Once the eggs and flour are incorporated, Start kneading the dough. This will likely take at least 15 minutes, and initially the dough will be very flaky and dry. Keep going to activate the gluten. If it's really not coming together, add some water, a tablespoon at a time, and keep kneading.
- Once the dough has become a smooth ball, cover tightly in plastic wrap, and let rest for half an hour.
- Set up your pasta roller. Cut the dough into four equal pieces, and flour the pasta, as well as the pasta roller.
- Flatten one chunk of dough into a disc. On the thickest setting, pass the disc through the roller. Fold the past into thirds like an envelope, and then pass through the roller again. Repeat process one more time. Flour the dough and roller if it starts getting sticky.
- Set the roller to the next thickest setting (2 on a stand mixer). Pass the sheet through on setting two. Next, set it to level 3, and pass dough through again, making thinner and thinner sheets. You can make them as thin or thick as you want (I usually do a 4-5 level).
- Cover the sheets with a damp cloth as you work through the rest of the dough, repeating the same process.
- Once the sheets are finished, you can either use a pasta cutter attachment and run the sheets through, or roll up each sheet and cut them by hand, depending on the type of noodle you want. Dust with flour to keep the noodles from sticking together.
- At this point, you can do what with the pasta, whether it's freeze or put it in the fridge for later, or cook right away.
Video
Notes
- If you feel like you're working hard when you're kneading this dough, it's because you are.
- If it's really not coming together for you, add water, a tablespoon at a time. But make sure you give it a good knead first!
- If it's too sticky, add more flour.
- As you're working with the dough, and then the sheets, and then the noodles, keep dusting with flour. Better to be safe than sorry.
- One of the best parts about homemade pasta is that it doesn't overcook easily. So while it will only take 90 seconds, if you leave it in for a bit extra, I haven't found it turns mushy in the same way store-bought dried stuff does!




Leave a Reply